Getting Started with Sitefinity and Microsoft Cognitive Services

Artificial Intelligence, Machine Learning, Cognitive Services: These are all buzzwords that are getting quite a bit of attention currently. Companies of all sizes are looking to integrate intelligence into their applications, and today it is easier than ever to do so. Microsoft offers a suite of Cognitive Services on Azure, IBM has Watson on the IBM Cloud and Google offers Google Cloud AI. Each of these platforms help to commoditize AI and make it easy to integrate AI into your custom applications.
At Smooth Fusion, we have standardized on the Microsoft Azure platform, so we are interested in looking at simple, affordable ways for our customers to dip their toes into the AI waters using Microsoft Cognitive Services. In this post, we will look at a proof-of-concept integration of the Text Analytics API with the Sitefinity CMS platform. The first part of the article will cover the use case and explain the integration at a high level. Then we will provide some technical information, in case you want to try this yourself.
Business Scenario
Microsoft's Text Analytics API has a sentiment detection feature which allows the developer to send a block of text to the API, and the API will return a score between 0 and 1. Scores closer to 0 indicate a negative sentiment, while scores closer to 1 indicate a positive sentiment. For example the following phrase "I had a wonderful experience! The rooms were wonderful and the staff was helpful" returns a score of .96, while the phrase "I had a terrible time at the hotel. The staff was rude and the food was awful" will return a .01.
A very common site feature for almost any site is a feedback form that allows users to submit comments about a service or experience. Using the Text Analytics API, we can examine a customer's comments to see if they had a positive or negative experience. Then we can implement some business rules against that analysis. For example, a user who leaves a negative review could be offered a coupon or a personal phone call. A user with a positive experience could be asked to leave a review on social media.
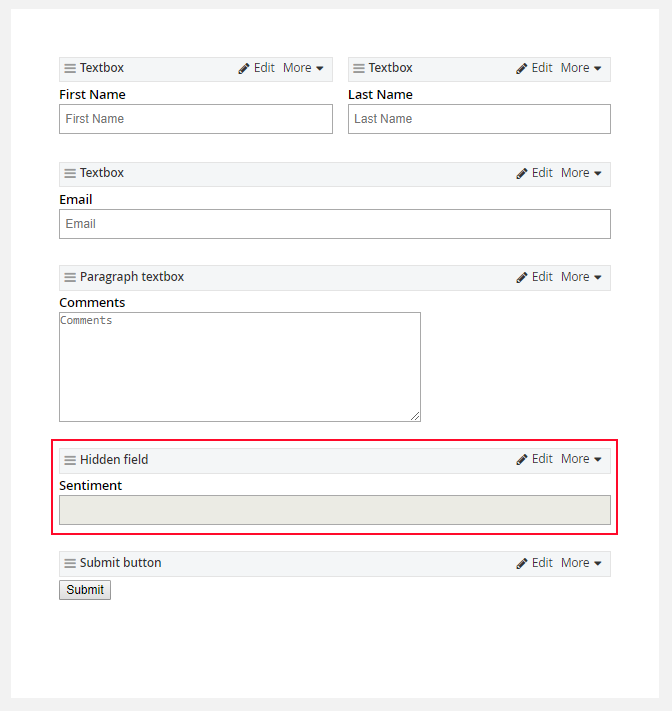
To experiment with the Text Analytics API inside of Sitefinity, we start by creating a simple contact form using the built-in forms capability in Sitefinity. I just created a new form and added fields for first name, last name, email address, and comments. The only interesting field is one called "sentiment," which is a hidden field that users will not see. It will be used to hold the sentiment analysis output.

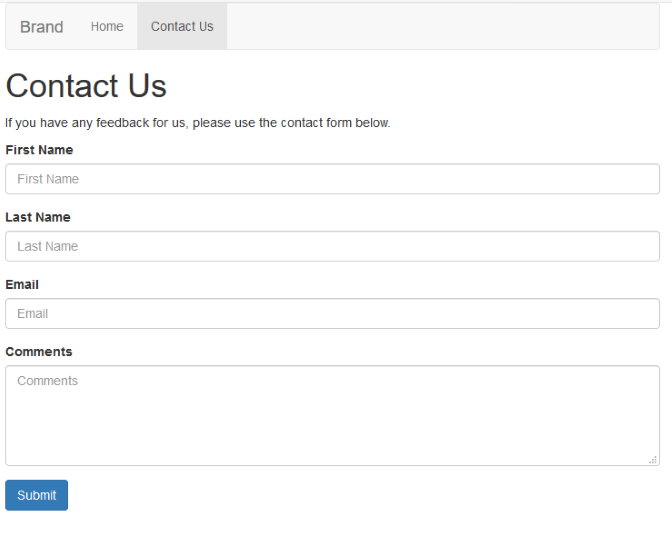
Once the form is created, you can add it to any site page using the built-in form selection widget. Below is what the form looks like on a simple test page. Note that the sentiment field is hidden as expected.

Once the user submits the form, a thank-you message is shown and the data is saved in the built-in Sitefinity forms module. This is where some custom coding comes into play. Up to this point, we have only used out-of-the-box Sitefinity features. Now is where a developer would need to step in to use the Text Analytics API. The technical details are explained in the next section, but basically when the form is submitted, custom code is used to detect the form post and send the user's comments off to the Text Analytics API. The API returns a value between 0 and 1, which we then interpret as either positive or negative. This sentiment value is added to the form post details so that it shows up in the form results too.

In addition to saving this sentiment value, you could also add some kind of work flow specific to the sentiment, like sending the user to a different form response page, triggering an email, etc. In the next section, we will take a look at some of the technical details needed to make this demo work end to end.
Technical Details
To complete the working demo, you will need to do the following steps first. Microsoft already has great documentation, so links are provided below.
1. Sign up for a free Microsoft Azure account
https://azure.microsoft.com/en-us/free/
2. Create a cognitive services account
https://docs.microsoft.com/en-us/azure/cognitive-services/cognitive-services-apis-create-account
3. Get your access key
https://docs.microsoft.com/en-us/azure/cognitive-services/text-analytics/how-tos/text-analytics-how-to-access-key
Once you have completed the steps above, you will need to create your contact form inside the Sitefinity backend. Just use the out-of-the-box features to create a new form and add your form fields. Make sure to add a new field called Sentiment to hold the API output. To intercept the form post and send the data to the API, you will need to add code to Global.asax.cs to wire up a new event handler.
protected void Application_Start(object sender, EventArgs e)
{
    SystemManager.ApplicationStart += new EventHandler(ApplicationStartHandler);
}

private void ApplicationStartHandler(object sender, EventArgs e)
{
    EventHub.Subscribe(evt => FormEntryCreatedEventHandler(evt));
}
Also in Global.asax.cs you will need the code to handle the interception of the form post:
public void FormEntryCreatedEventHandler(IFormEntryCreatedEvent eventInfo)
{
    var entryId = eventInfo.EntryId;
    var formName = eventInfo.FormName;

    if (formName == "sf_customercontactform") //make sure to use the form name you created
    {
        FormsManager formsManager = FormsManager.GetManager();
        var form = formsManager.GetFormByName(formName);
        var entries = formsManager.GetFormEntries(form.EntriesTypeName);
        var entry = formsManager.GetFormEntry(form.EntriesTypeName, entryId);
        var comments = entry.GetValue("ParagraphTextFieldController");
        //above appears to be a bug, where cannot get it by the name "Comments" that I gave it on the form
        //https://knowledgebase.progress.com/articles/Article/cannot-find-the-fieldname-field-in-the-mvc-form-widget-s-advanced-settings

        //The sentiment document class, just gets the data ready to pass to the API
        //in the proper format.
        SentimentDocument document = new SentimentDocument
        {
            id = entryId.ToString(),
            text = comments.ToString(),
            language = "en"
        };

        //the api needs a root node because you can pass more than once document to it
        var documentCollection = new List();
        documentCollection.Add(document);
        dynamic collectionWrapper = new
        {
            documents = documentCollection
        };


        string json = JsonConvert.SerializeObject(collectionWrapper, Formatting.Indented);

        //This is the call to a helper method which actually calls the API.
        string output = CognitiveService.DetectSentiment(json);
        dynamic x = JsonConvert.DeserializeObject(output);
        string sentiment = ConvertScoreToSentiment((float)x.documents[0].score);

        //This code takes the output sentiment value and saves it back to the form entry
        entry.SetValue("Sentiment", sentiment);
        formsManager.SaveChanges();

    }
}
In addition to the changes in the Global.asax.cs file, I created two additional files and put them in the "Custom" folder: CongnitiveService.cs and SentimentDocument.cs.
namespace SitefinityWebApp.Custom
{
    public class SentimentDocument
    {
        public string language { get; set; }
        public string id { get; set; }
        public string text { get; set; }
    }
}
namespace SitefinityWebApp.Custom
{

    public class CognitiveService
    {
        public static string DetectSentiment(string json)
        {
            //make sure to change the URI to match the endpoint you setup in Azure
            var uri = "https://southcentralus.api.cognitive.microsoft.com/text/analytics/v2.0/sentiment";

            var httpWebRequest = (HttpWebRequest)WebRequest.Create(uri);
            httpWebRequest.ContentType = "application/json";
            httpWebRequest.Method = "POST";

            //add your key below
            httpWebRequest.Headers.Add("Ocp-Apim-Subscription-Key", "{YOUR KEY HERE}");
            using (var streamWriter = new StreamWriter(httpWebRequest.GetRequestStream()))
            {
                streamWriter.Write(json);
                streamWriter.Flush();
                streamWriter.Close();
            }
            var httpResponse = (HttpWebResponse)httpWebRequest.GetResponse();
            string result;
            using (var streamReader = new StreamReader(httpResponse.GetResponseStream()))
            {
                result = streamReader.ReadToEnd();
            }
            return result;
        }
    }
}
That should be all you need! Keep in mind, this is just a proof of concept and there are lots of areas for improvement, like making the calls to the API Async.
Smooth Fusion is a custom web and mobile development company and leading Progress Sitefinity CMS Partner. We create functional, usable, secure, and elegant software while striving to make the process painless for our customers. We offer a set of core services that we’ve adapted and refined for more than 250 clients over our 18 years in business. We’ve completed more than 1800 projects across dozens of industries. To talk to us about your project or review our portfolio, send us a message and one of our project managers will reach out to you quickly.


